4 Ways to Free Screen Recording on Windows 10 (No Watermark)
You may want to record your computer screen for various reasons. This can be to record tutorials, presentations, or just record an issue to show to others. Whatever the reason, it's quite easy to record screen on Windows 10 just like screen recording on a phone. Although there is no dedicated screen recording feature, here are four different ways to Screen recording on Windows 10 for free without any watermark.
Also, read | How to keep a window always in the foreground in Windows 10 and macOS
Record screen on Windows 10 for free without watermark
From using third-party software to trying out the hidden screen recording feature, here are some easy and free ways to record the screen on any Windows 10 computer.
Method 1 - Windows 10 built-in game bar
The preinstalled Xbox Game Bar was intended to record game clips. However, it can also be used to record other items on your screen. You can reinstall the Xbox app and Xbox Game Bar from the Microsoft Store if it was removed in the past.
Before you begin, note that not all Windows 10 machines can record on-screen with the Game Bar. This only works if your laptop's video card supports one of three encoders: Intel Quick Sync H.264, Nvidia NVENC or AMD VCE.
Activate the game bar in the settings
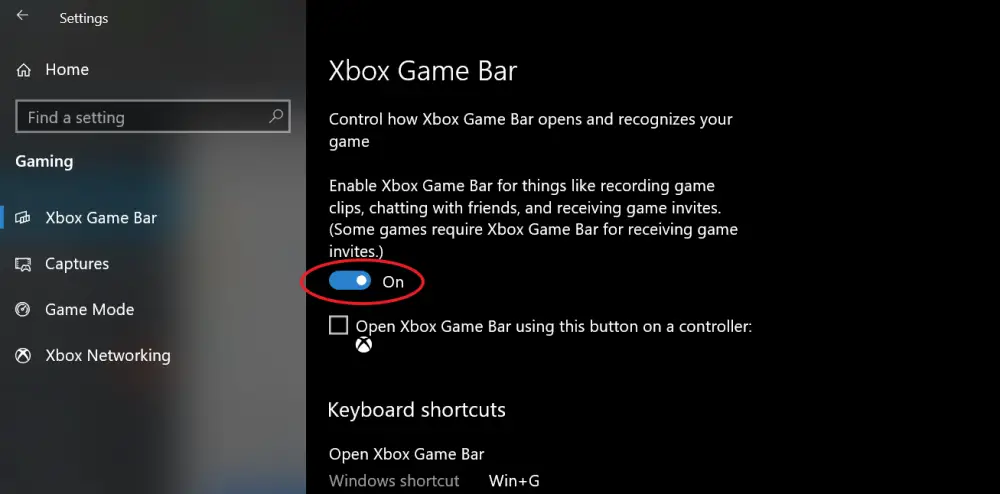
- Open Settings on your computer.
- Click on Games.
- On the next screen, check if the game bar is enabled.
- Otherwise, activate the button for " Activate the Xbox Game Bar for things like recording a game clip »
Enable screen recording

- press Windows key + G on your keyboard to open the Game Bar. You can also manually open the Game Bar application from the Start menu.
- Tap "Yes, it's a game" if prompted.
- Now press the All time lap record to start recording. You can also press Windows key + Alt + R to start recording your computer screen.
- Use the same button or key combination to stop screen recording.
Recorded files can be viewed by clicking on "Show all captures". Note that Game Bar does not support screen recording for Desktop and File Explorer.
Method 2 - Microsoft PowerPoint
If Microsoft PowerPoint is installed on your PC, you don't need to look anywhere else for screen recording. Yes, you can record your Windows 10 screen using PowerPoint. Below is how you can use it to record and save your screen video.
Record screen using PowerPoint
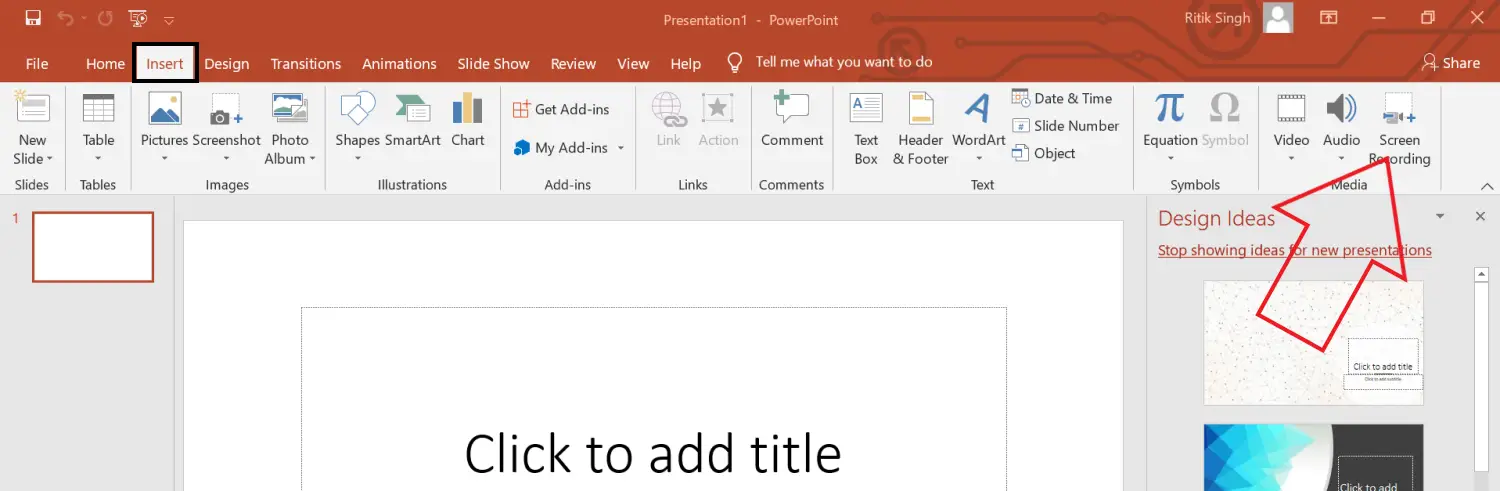
- Launch Microsoft PowerPoint on your computer.
- Open a blank presentation.
- Once the presentation is open, click Insert in the toolbar at the top.
- Then click on Screen recording on the far right.

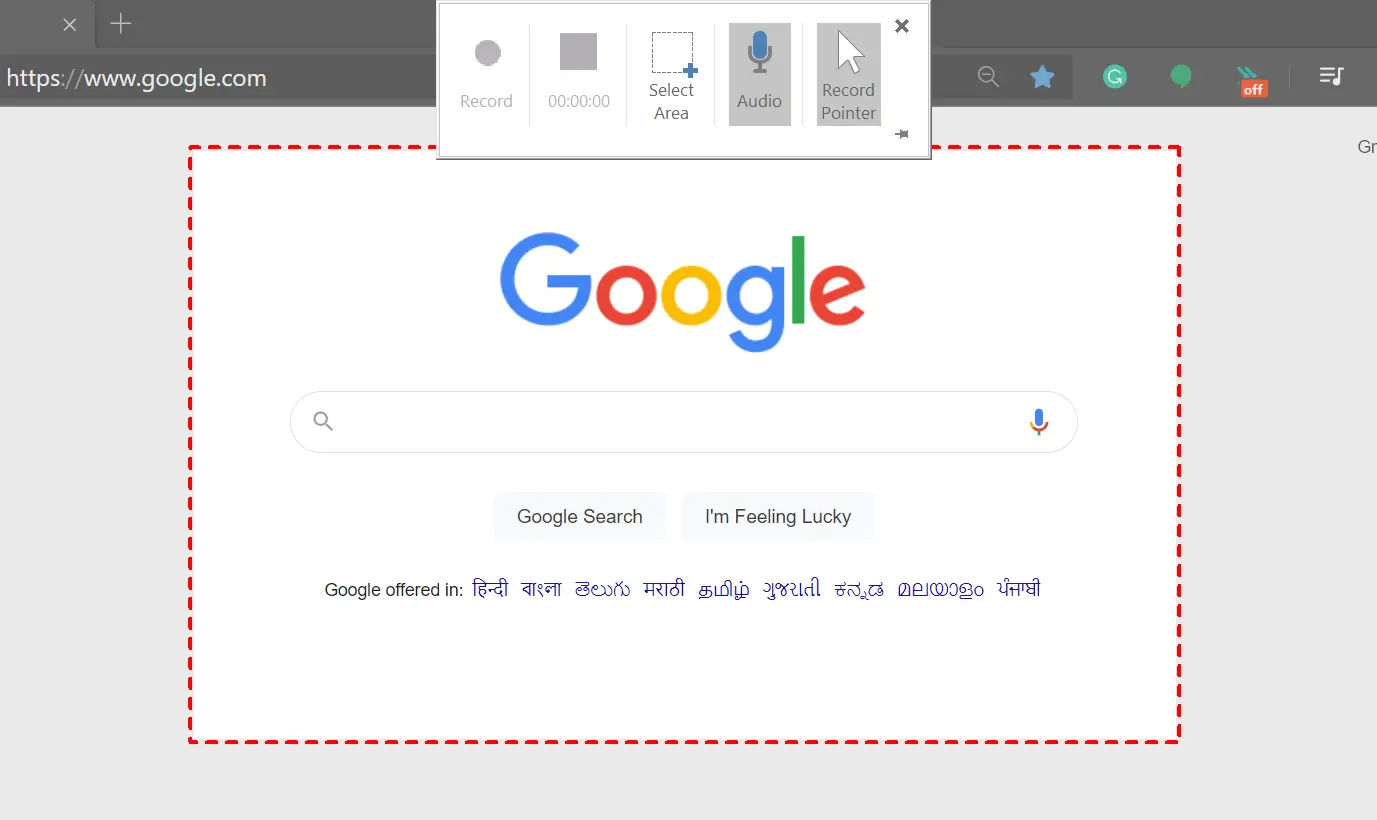
- Now select the screen area you want to record.
- press the All time lap record to start screen recording.

- When done, click again to stop recording. Can't see the option? Hover your mouse over the top of the screen.
Save video file
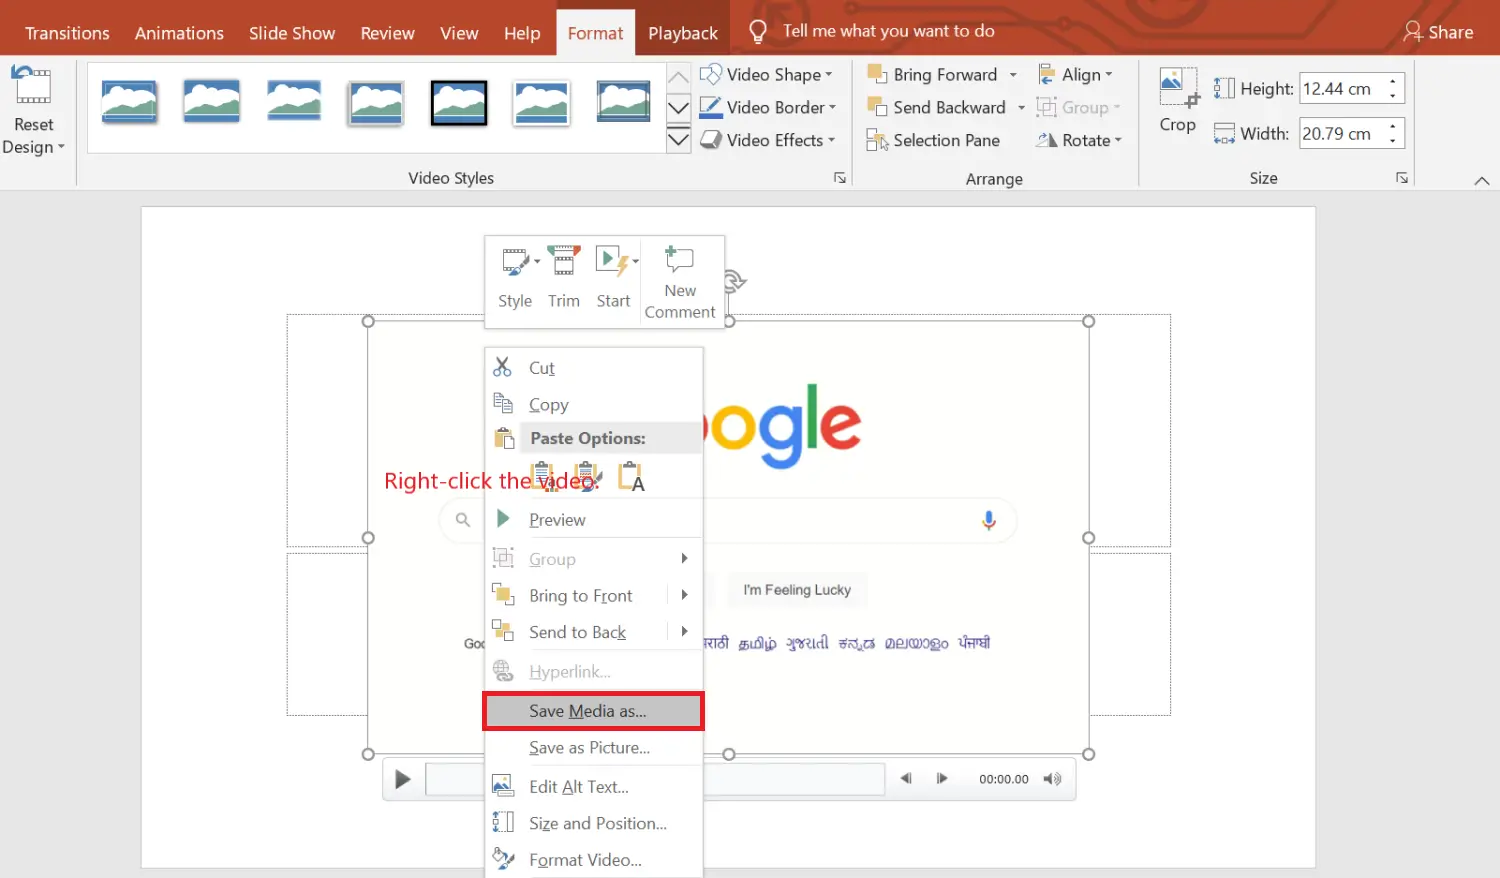
- The screen recording will automatically be integrated into the presentation.
- To save it as a video file on your computer, right click on it.
- Then select Save media as and choose where you want to save it.
- The screen recording will be saved as an MP4 video file in the desired folder.
Method 3 - Apowersoft Free Online Screen Recorder
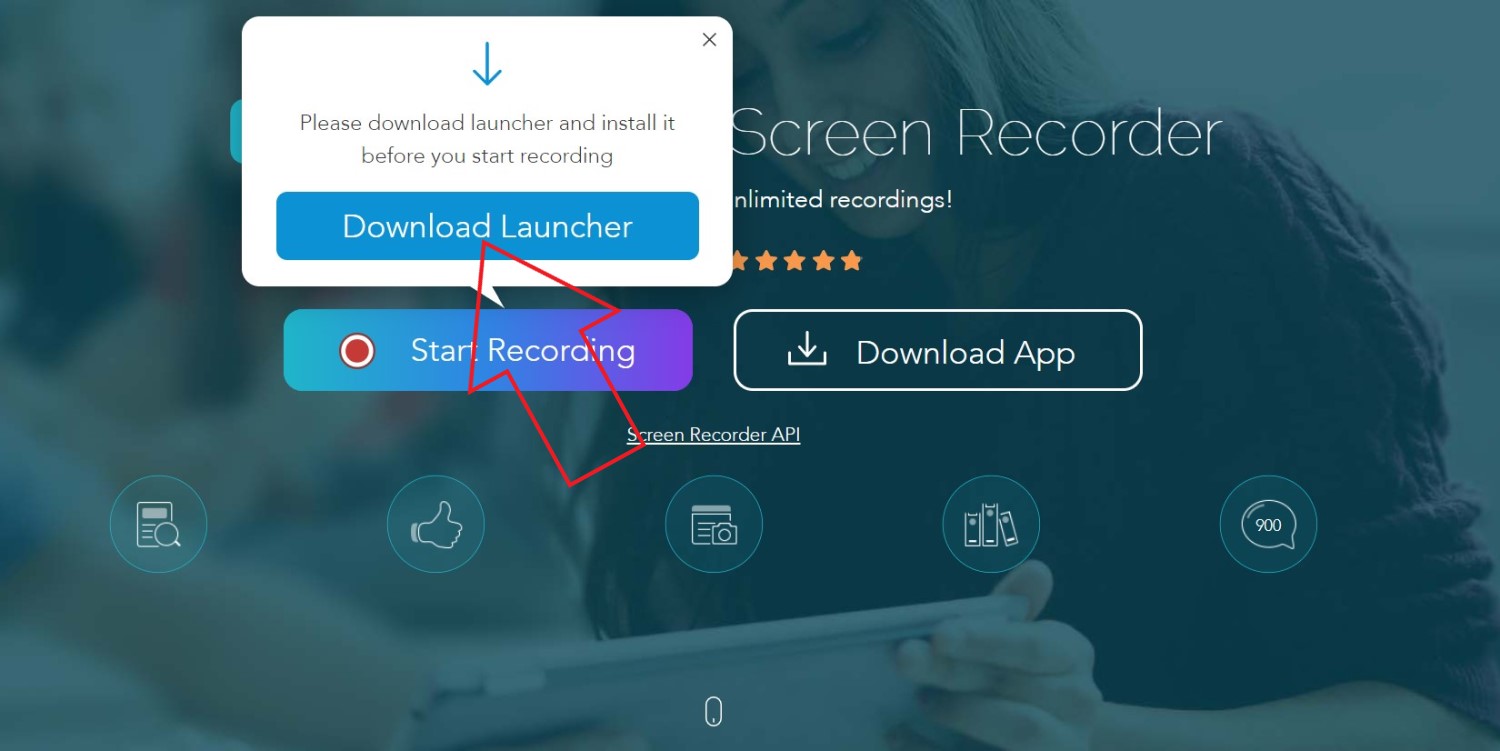
Apowersoft Online Screen Recorder is a browser-based tool that allows you to record your Windows PC screen. To use it, visit this page and click on Start recording> Download launcher. Once the launcher has downloaded, open it and you are good to go.
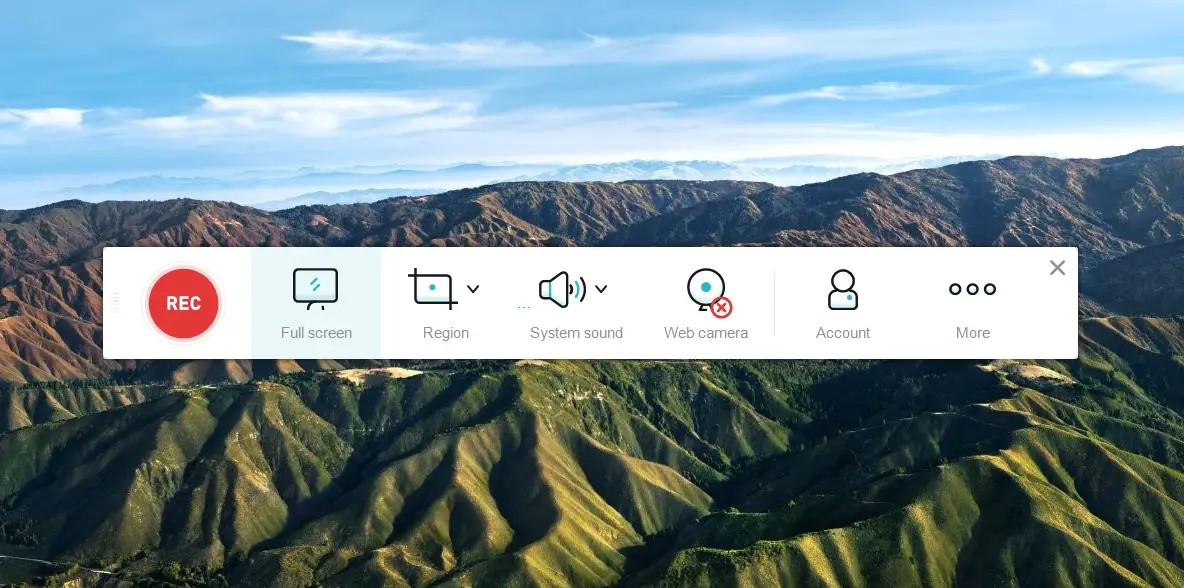
Online screen recorder is lightweight, free, and doesn't get in the way of watermarks. It also allows you to record system audio alongside microphone audio. Additionally, you can record webcam videos side by side which can be helpful while giving tutorials.
All-inclusive, it might not be ideal for screen recording games, but it's more than enough if you want to record tutorials or presentations.
Method 4- OBS Studio
OBS Studio is a very feature-rich screen recording software for Windows 10. You can use it for video recording and live streaming without watermark, advertising or time limit.
It is an open source program that allows you to record in full screen or window with system or microphone audio and webcam video. You can also simultaneously record a recording and a live broadcast to YouTube, Twitch and more.
However, it can be overwhelming and beginners may find it difficult to use it. To make things easier, below are the steps to record Windows 10 screen using OBS Studio.
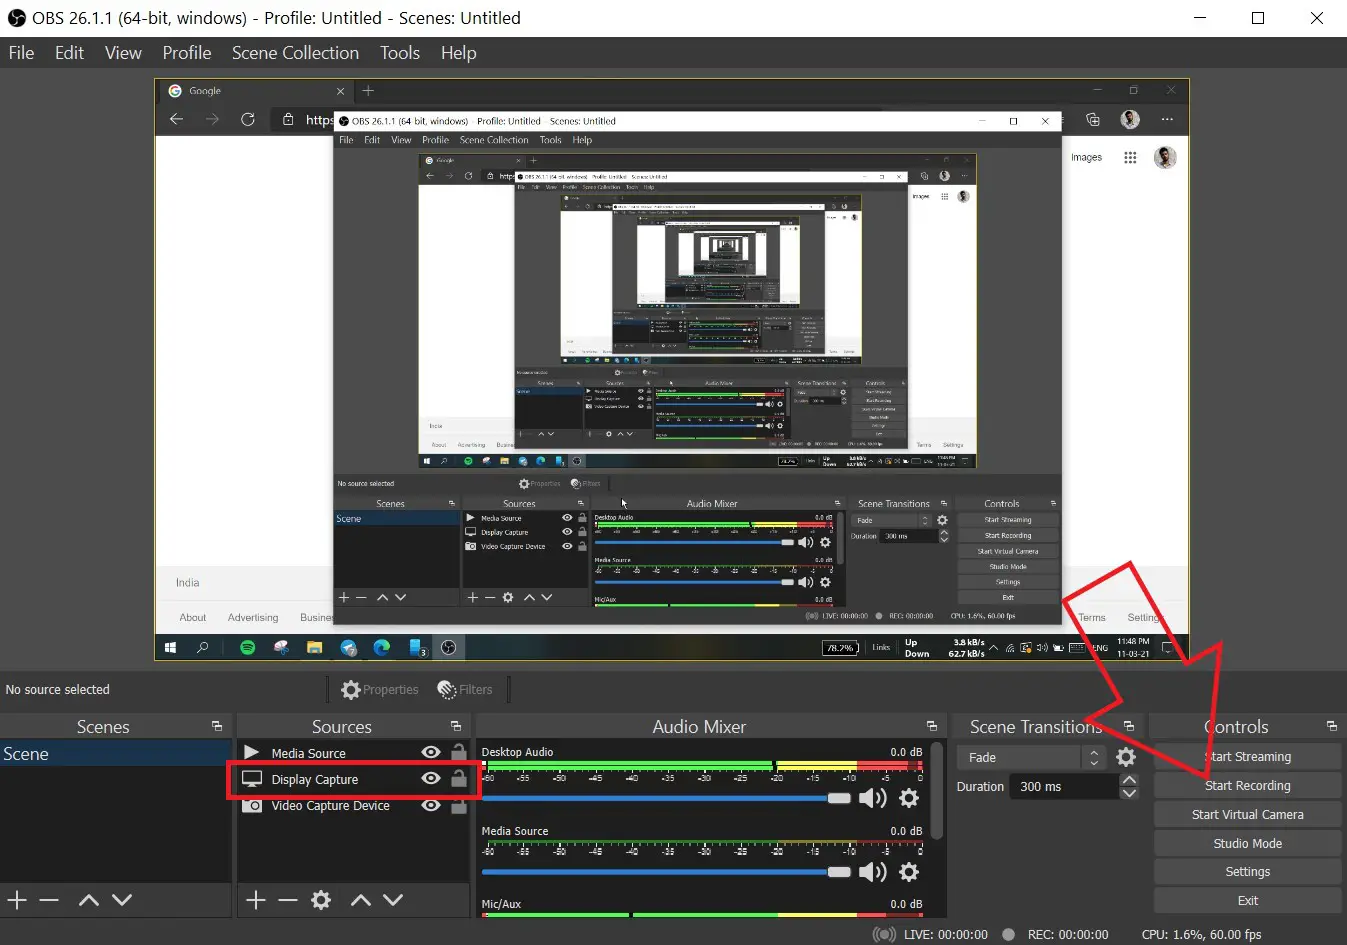
- Download and install OBS Studio from the official site.
- Open the app and select Screenshot under Sources. If you don't see the option, click “+” and manually add the display capture.
- Then click on Start recording bottom right to start screen recording.
Are you facing the black screen issue in OBS recordings?
This is a common issue where OBS Studio can produce black screen recordings without video on Windows 10. If so, here is the fix you need to follow:
- Open Settings from the Windows Start menu.
- Here click on System> Display.
- Scroll to the bottom and click Graphics settings.
- Click on Browse and select the OBS Studio executable file. The default location is C: Program Files obs-studio bin 64bit obs64.exe.

- Once OBS Studio is added, tap on it and select Options.

- Select Energy saving and click Save.
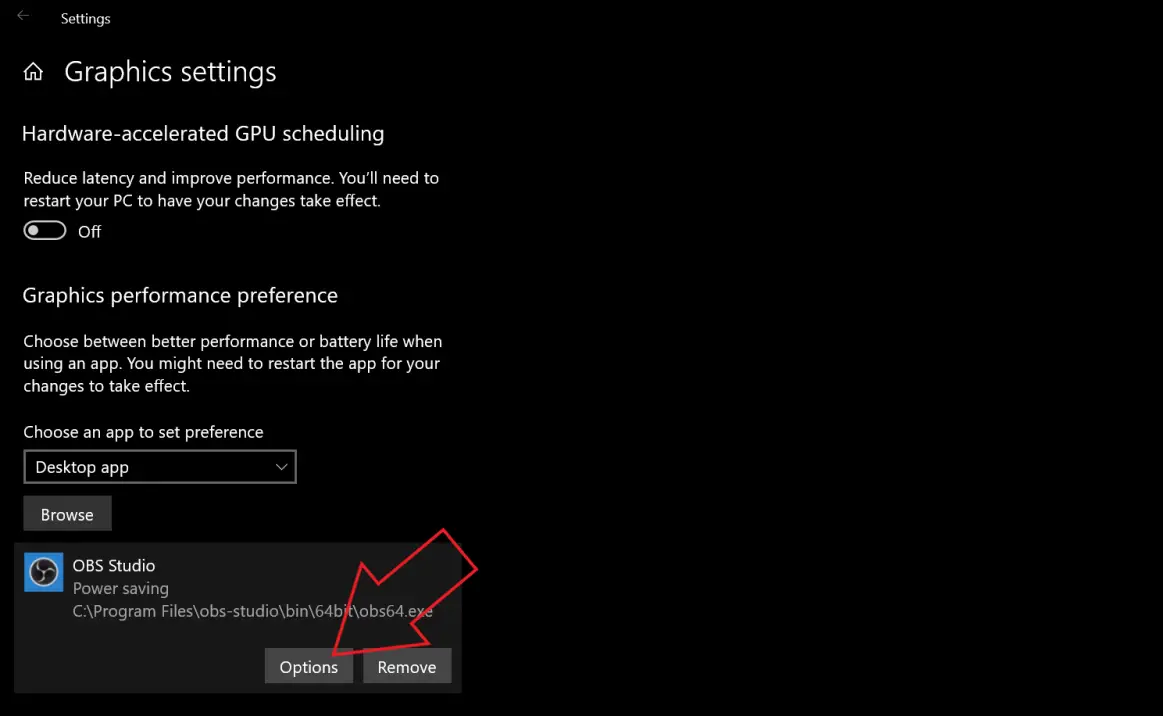
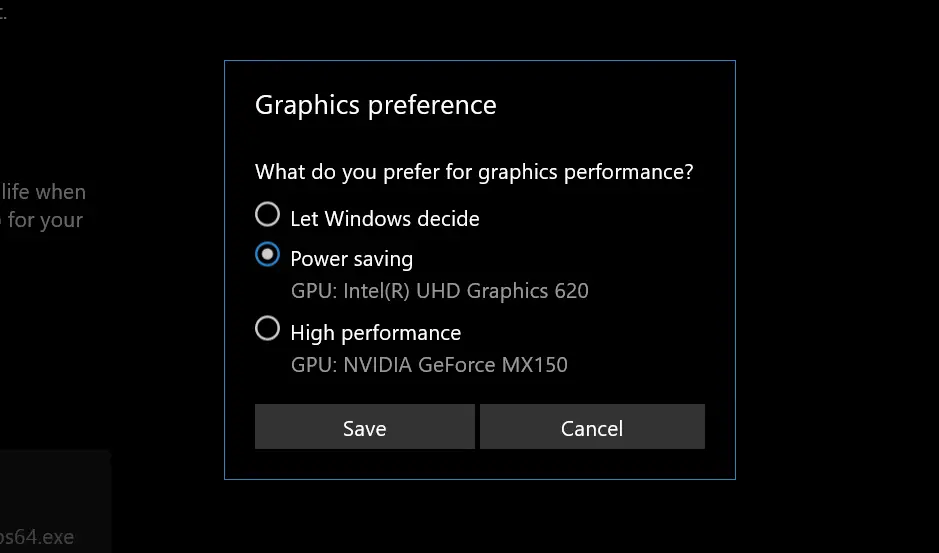
This should fix the black screen issue in OBS Studio. However, if it still doesn't, repeat the steps and select High performance instead of energy saving.
Wrapping Up - Windows 10 Screen Recording Without Watermark
These are the four best ways to filter recording on your Windows 10 PC for free. Mostly, I personally use PowerPoint to record the content on my computer screen. Anyway, what are you going to use for it? Let me know in the comments below. Stay tuned for more articles like this.
Also, read 3 Ways to Remove Activate Windows Watermark on Windows 10
Some other useful tips and tricks for you